An ancestral tree at DNA Painter is an interactive chart of just one person’s direct line:
- This person, plus all their known direct ancestors
Here are the steps involved in creating one. Before you start, you’ll need to have registered for a free DNA Painter account. I have a separate guide confirming how to to do that.
Step 1: Log in
Go to dnapainter.com and click Sign in in the top right corner (or if you want to do it now, click here).

Step 2: Click the Ancestral Trees tab
You’ll then be in your dashboard, where you can find all the maps and trees you’ve created at DNA Painter.
If you’re not already on the ancestral trees tab, click on it

Click the Create a new tree button.

You will then be taken to a new tree ready for you to populate.
Step 3: Import your direct line or create it manually
- If you already have a family tree, you can export it as a GEDCOM file from your family tree software, and then upload that to DNA Painter in order to extract your direct line.
- If you don’t have a tree, you can build your direct line out on-screen at DNA Painter
Creating an ancestral tree manually
A newly created tree is populated with a four-generation generic tree with names like Mother, Father, Grandfather, and Great-grandmother.

You can edit this tree by simply clicking on any of these nodes and typing a name. After you hit enter, this name will be saved.
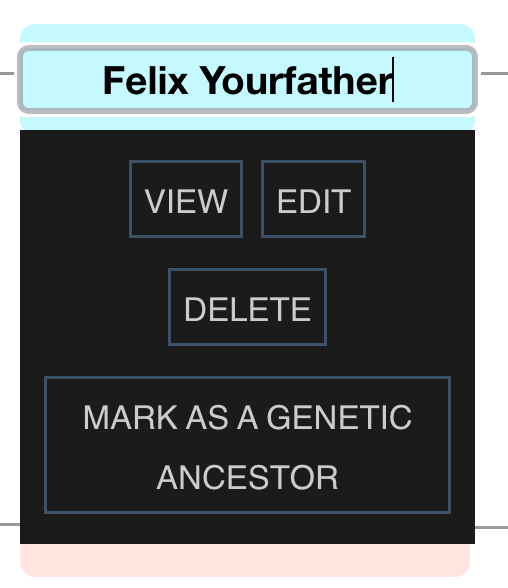
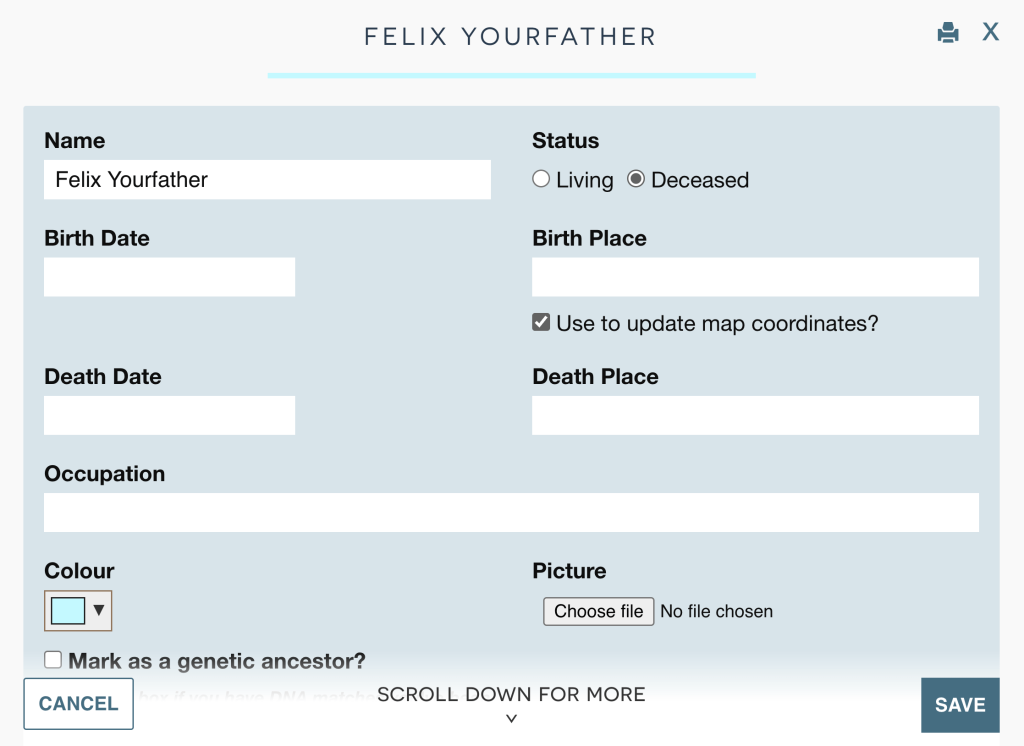
To add more information, or to edit a name you’ve already added, hover over any node and then click Edit. This will bring up an overlay.
To add additional nodes, click on the person you want to add parents for and click Add parents.
Importing a GEDCOM
Rather than add ancestors one by one, you can select a GEDCOM file and DNA Painter will then extract and import your direct ancestors.
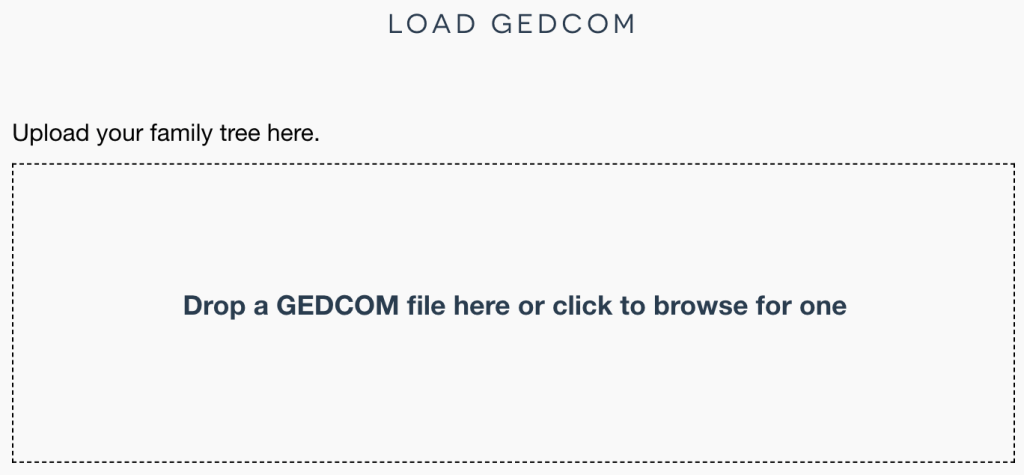
Click Load GEDCOM on the right (note that this button won’t appear if you’re on a phone)

An overlay will appear. You can click on this overlay and browse for your GEDCOM file, or drag and drop the file onto the overlay.
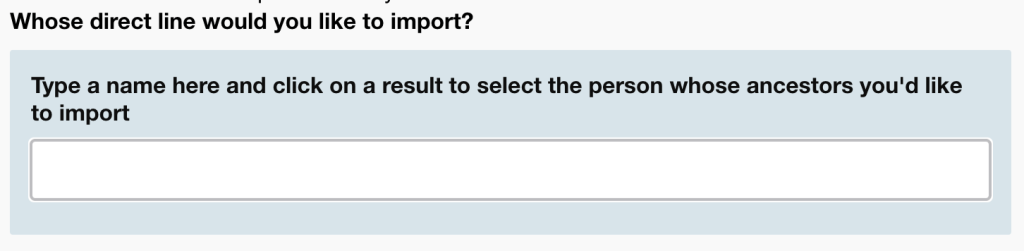
After your file has loaded, you’ll see pale blue panel that says Type a name here. This is where you need to type a few characters of the name of the person whose ancestors you want to import:
As you type, the names from your tree that match will appear.
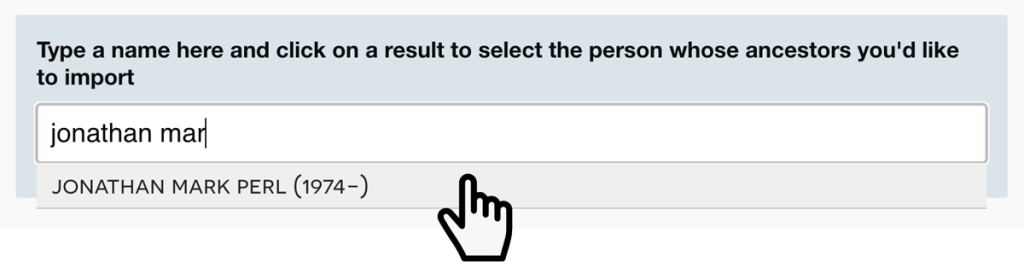
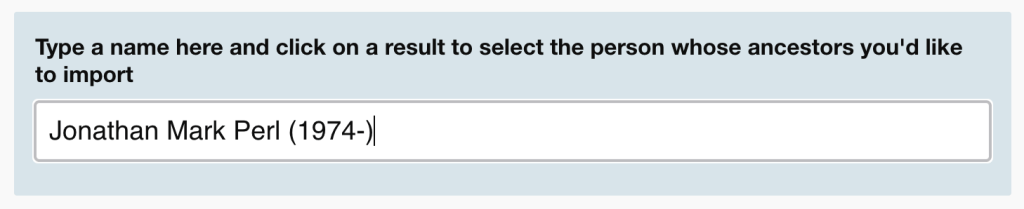
Once you see the person you want to use as the root person in your tree, click their name to select them.
You’ll then see a heading, Import Settings. By default, the names of all living people will be replaced with ‘Living’, and any other info about them will be omitted. If you would prefer to import the names and details of living people, simply click on this option.
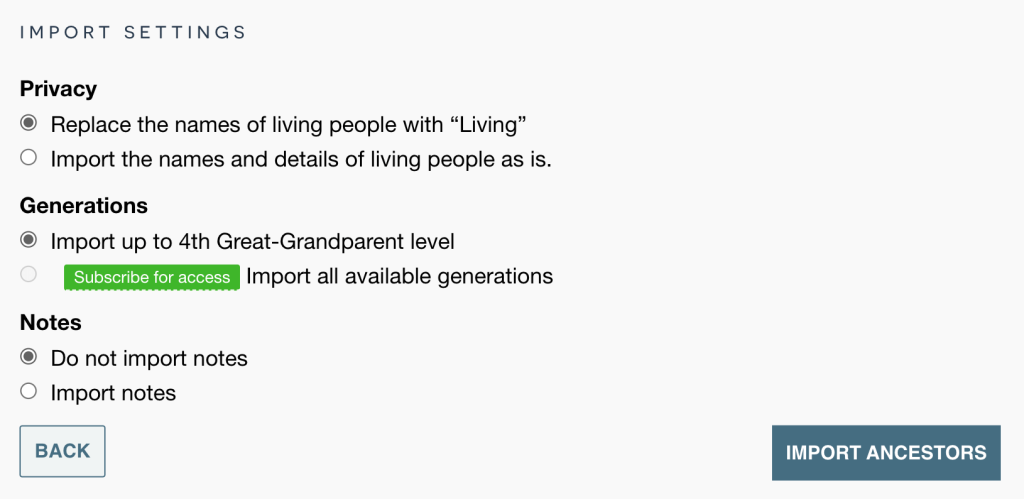
If you are DNA Painter subscriber, you then have the option to import eight generations of your tree, or all available generations. Free users can import up to 4th-great-grandparent level without subscribing.
You can also choose whether or not to include the notes field.
Once you’re ready, click Import ancestors

Step 4: Explore the features of ancestral trees
You’re now ready to explore the many features and display options available. Below are a few of these, followed by some links to posts that explain in more detail.
Views
There are now four different views in a tree:
Filters
You can filter your tree using the following parameters
- Generations slider, X-DNA, Y-DNA, Mitochondrial DNA, Genetic ancestors
Dimensions
Dimensions are categories of facts in your tree that DNA Painter can extract, or which you can add yourself, such as age at death and country of birth.
Reports
Several useful reports are now available, including
- Brick Walls, Genealogy Facts, Tree Completeness
Sharing
You can optionally share any link via the Share button at the top right.
Display options
Under the settings cog at the right, you’ll see options to display photos, ahnentafel numbers, haplogroups and more.
You’ll also see colour palettes, allowing you to apply a set of colours to your tree
Further reading
- Eight ways you can use ancestral trees at DNA Painter
- Enhanced ancestral trees: Brick Walls, Pictures and Dots
- Introducing Places, a new geographical map of your Ancestral Tree
- Keeping track of genetic ancestors: did you know? #2
- New features for maps, trees and WATO at DNA Painter
- DNA Painter Dimensions: a new way to showcase your ancestral line
- Bringing Y, mt and mitoYDNA into DNA Painter trees
I hope this has been useful and that you are now clear on how to create an ancestral tree at DNA Painter!
Contact info: @dnapainter.bsky.social / jonny@dnapainter.com